Have any questions? +1 646.844.5712 (US)

  • Facebook
  • LinkedIn
  • Twitter
HiTech ServiceHiTech Service
  • Home
  • About
  • Services
    • Software Development
    • Customer Support
    • Quality Assurance
    • Managed Services
    • Compliance Audit
    • GDPR Compliance
    • Competency Center
    • Emergency IT Support
    • Software as medical device
    • Local AI Agent Development
  • Projects
  • GDPR
  • Articles
  • Case Studies
  • Contact
Menu
  • Home
  • About
  • Services
    • Software Development
    • Customer Support
    • Quality Assurance
    • Managed Services
    • Compliance Audit
    • GDPR Compliance
    • Competency Center
    • Emergency IT Support
    • Software as medical device
    • Local AI Agent Development
  • Projects
  • GDPR
  • Articles
  • Case Studies
  • Contact
How to disable User Account Control in Windows 10

How to disable User Account Control in Windows 10

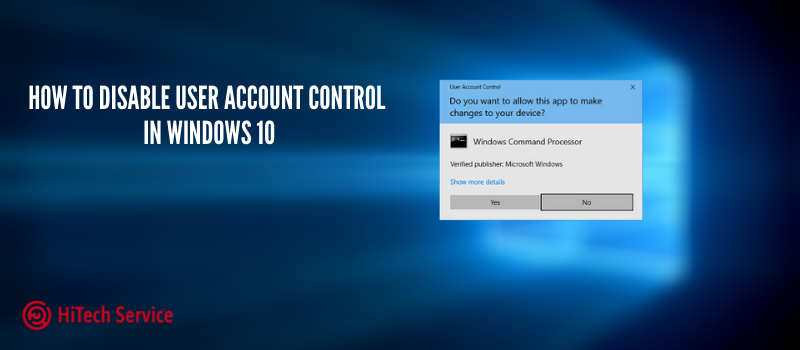
User Account Control (or UAC) in Windows 10 notifies you when some software or actions require administrator privileges on your computer (which usually means that a program or action will change your system settings or files). This function launches to protect you from potentially dangerous actions and launching software that can harm your computer.

We will show you several ways to disable User Account Control in Windows 10: via Control Panel, by changing UAC Settings in Registry Editor, disabling UAC via Command Prompt and in the Local Group Policy Editor.

How to turn off User Account Control in Windows 10 Control Panel

  1. Open the Control Panel. You can use the search in the taskbar or press the Win + R keys, type ‘control’, and press Enter. Or you can go directly to step 4 by pressing Win + R and entering UserAccountControlSettings.
  2. In the control panel, open User Accounts.
  3. In the next window, click Change User Account Control Settings.
ZhmALzqOkwWruih5RKi9ZOjt 7PF9WO2KPxzrNCUL7i 1piXCBHmTsPQldxKEkh Z4b4ff7zJNiktgy2IqmCw7u1attRSRkySsnQUxCw34pqG2ZH liqjl85j5fuBebiNPVTHmNW — How to disable User Account Control in Windows 10
  1. Next, you can manually set the UAC settings or disable Windows 10 User Account Control just select one of the options for setting the UAC operation, each of which is explained below.

  • Always notify. It is the safest option. For any action that can change something, as well as for actions of third-party programs, you will receive a notification about it. Regular users (not administrators) will need to enter a password to confirm the action.
  • Notify me only when apps try to make changes to my computer. This option is set by default in Windows 10. It means that only program actions are controlled, but not user actions.
  • Notify me only when apps try to make changes to the computer (do not dim my desktop). The difference from the previous point is that the desktop is not dimmed or blocked, which in some cases (viruses, trojans), can be a security threat.
  • Never notify me. UAC is disabled and does not notify about any changes in computer settings initiated by you or programs.

If you decide to disable Windows 10 User Account Control, which is not a safe practice at all, you should be very careful in the future. All the programs will have access to the system, while User Account Control will not tell you if some of those may affect the device. In other words, if the reason for disabling UAC is only because it “interferes”, I strongly recommend enabling it back.

Changing User Account Control Settings in Registry Editor

Disabling UAC and choosing any of the four Windows 10 User Account Control options is also possible using the Registry Editor (to launch it, press Win + R on your keyboard, and type ‘regedit’).

UAC operation parameters are determined by three registry keys located in the section:

HKEY_LOCAL_MACHINE\SOFTWARE\Microsoft\Windows\CurrentVersion\Policies\System

Go to this section and find the following DWORD parameters on the right side of the window: PromptOnSecureDesktop, EnableLUA, ConsentPromptBehaviorAdmin. To completely disable User Account Control, simply change the value of the EnableLUA parameter to 0 (zero), close the Registry Editor, and restart the computer.

Disabling UAC via Command Prompt

  1. Run the command prompt with administrator privileges.
  2. Enter the following command: reg ADD HKLM\SOFTWARE\Microsoft\Windows\CurrentVersion\Policies\System /v EnableLUA /t REG_DWORD /d 0 /f
  3. Close Command Prompt and restart your device.

How to disable User Account Control in Windows 10 Local Group Policy Editor

  1. Press Win + R keys on your keyboard, type ‘gpedit.msc’, and press Enter.
  2. In the editor, navigate to Computer Configuration – Windows Settings- Security Settings – Local Policies – Security Options.
  3. In the right pane, find the option “User Account Control: Admin Approval Mode for the Built-in Administrator Account” and double-click it.
  4. Click on ‘Disabled’ and save it.
  • On October 20, 2020
  • 0 Comment

Leave Reply Cancel reply

Your email address will not be published. Required fields are marked *

Recent Posts
  • Managed IT Services vs. In-House IT: What Should You Choose?
  • When the Model Is the Vendor: What Happens to Compliance When You Don’t Own the Weights
  • The Edge Device Is the Perimeter: Why the Box You Bought to Keep Them Out Is How They Get In
  • The Password Memo Was Honest. The Checklist Wasn’t.
  • As Is: How Software Became the Only Product You Could Legally Sell Broken
Categories
  • ai (9)
  • android (18)
  • apple (36)
  • chart (18)
  • cloud (1)
  • fix (42)
  • games (11)
  • google (31)
  • hardware (73)
  • healthcare (3)
  • how to (231)
  • internet (92)
  • ios (23)
  • macos (3)
  • microsoft (82)
  • mobile (36)
  • news (74)
  • optimization (17)
  • osx (4)
  • outsourcing (9)
  • qa (3)
  • regulation (8)
  • review (120)
  • security (41)
  • software (160)
  • windows (150)
Archives
  • September 2026
  • August 2026
  • July 2026
  • June 2026
  • May 2026
  • August 2025
  • March 2025
  • February 2025
  • April 2023
  • March 2023
  • February 2023
  • January 2023
  • March 2022
  • January 2022
  • December 2021
  • November 2021
  • October 2021
  • September 2021
  • August 2021
  • July 2021
  • June 2021
  • May 2021
  • April 2021
  • March 2021
  • February 2021
  • January 2021
  • December 2020
  • November 2020
  • October 2020
  • September 2020
  • August 2020
  • July 2020
  • June 2020
  • May 2020
  • April 2020
  • March 2020
  • February 2020
  • January 2020
  • December 2019
  • November 2019
  • October 2019
  • September 2019
  • August 2019
  • April 2019
  • March 2019
  • February 2019
  • January 2019
  • December 2018
  • November 2018
  • October 2018
  • September 2018
  • June 2018
  • May 2018
  • April 2018
  • February 2018
  • January 2018
  • December 2017
  • November 2017
  • October 2017
  • June 2017
  • May 2017
  • April 2017
  • March 2017
  • February 2017
  • January 2017
  • December 2016
  • November 2016
  • October 2016
  • September 2016
  • August 2016
  • July 2016
  • June 2016
  • May 2016
  • April 2016
  • March 2016
  • February 2016
  • January 2016
  • December 2015
  • November 2015
  • October 2015
  • September 2015
  • July 2015
  • January 2015
Archives
  • September 2026
  • August 2026
  • July 2026
  • June 2026
  • May 2026
  • August 2025
  • March 2025
  • February 2025
  • April 2023
  • March 2023
  • February 2023
  • January 2023
  • March 2022
  • January 2022
  • December 2021
  • November 2021
  • October 2021
  • September 2021
  • August 2021
  • July 2021
  • June 2021
  • May 2021
  • April 2021
  • March 2021
  • February 2021
  • January 2021
  • December 2020
  • November 2020
  • October 2020
  • September 2020
  • August 2020
  • July 2020
  • June 2020
  • May 2020
  • April 2020
  • March 2020
  • February 2020
  • January 2020
  • December 2019
  • November 2019
  • October 2019
  • September 2019
  • August 2019
  • April 2019
  • March 2019
  • February 2019
  • January 2019
  • December 2018
  • November 2018
  • October 2018
  • September 2018
  • June 2018
  • May 2018
  • April 2018
  • February 2018
  • January 2018
  • December 2017
  • November 2017
  • October 2017
  • June 2017
  • May 2017
  • April 2017
  • March 2017
  • February 2017
  • January 2017
  • December 2016
  • November 2016
  • October 2016
  • September 2016
  • August 2016
  • July 2016
  • June 2016
  • May 2016
  • April 2016
  • March 2016
  • February 2016
  • January 2016
  • December 2015
  • November 2015
  • October 2015
  • September 2015
  • July 2015
  • January 2015

Built-in Google Chrome password security checker

Previous thumb

HiTech Service 14th anniversary!

Next thumb
Scroll

Services

  • Software Development
  • Quality Assurance
  • Customer Support
  • Managed Services
  • 24/7 Emergency IT Support
  • Competency Center
  • Local AI Agent Development
  • Software as a Medical Device

Compliance

  • Compliance Audit
  • GDPR Compliance
  • What is GDPR
  • ISO 9001:2015 Certification

Company

  • About Us
  • All Services
  • Projects
  • Case Studies
  • Articles
  • Contact
About HiTech Service

With 10 year experience of working together, we have reached tangible synergetic effect in performance and productivity, which results in highest quality services and satisfied clients.

Privacy Policy   Cookie Policy


  • Facebook
  • X
  • LinkedIn
CONTACT INFO
  • 900 Foulk Rd, Suite 201, Wilmington, DE, USA, 19803
  • Kudryavs’kyi descent 5b, Kyiv, Ukraine, 04053
  • +1 646.844.5712 (US)
ISO 9001:2015 certificate issued to HiTech Service LLC by Veritas
RIPE Atlas logo, the network measurement community HiTech Service takes part in
BrainBasket Foundation logo, IT education initiative HiTech Service supports
HiTech Service LLC membership badge of the Hi-Tech Office Ukraine association Dun & Bradstreet verified business badge for HiTech Service LLC
YouTeam partner badge for HiTech Service LLC
Hitech Service LLC

Copyright 2026