How to make subtitles?
Making subtitles is one of those skills that often become necessary in the most inappropriate moment. Initially you never actually need it, but when you do, you have to get to it as fast as possible. Making a small instructive video for your colleagues, subbing a movie or cartoon, or dealing with a project – whatever type of work you got, it’s important to learn everything beforehand and not postpone it to the very last minute. So, where do we actually start? Let’s dig it.
1) Choose your software.
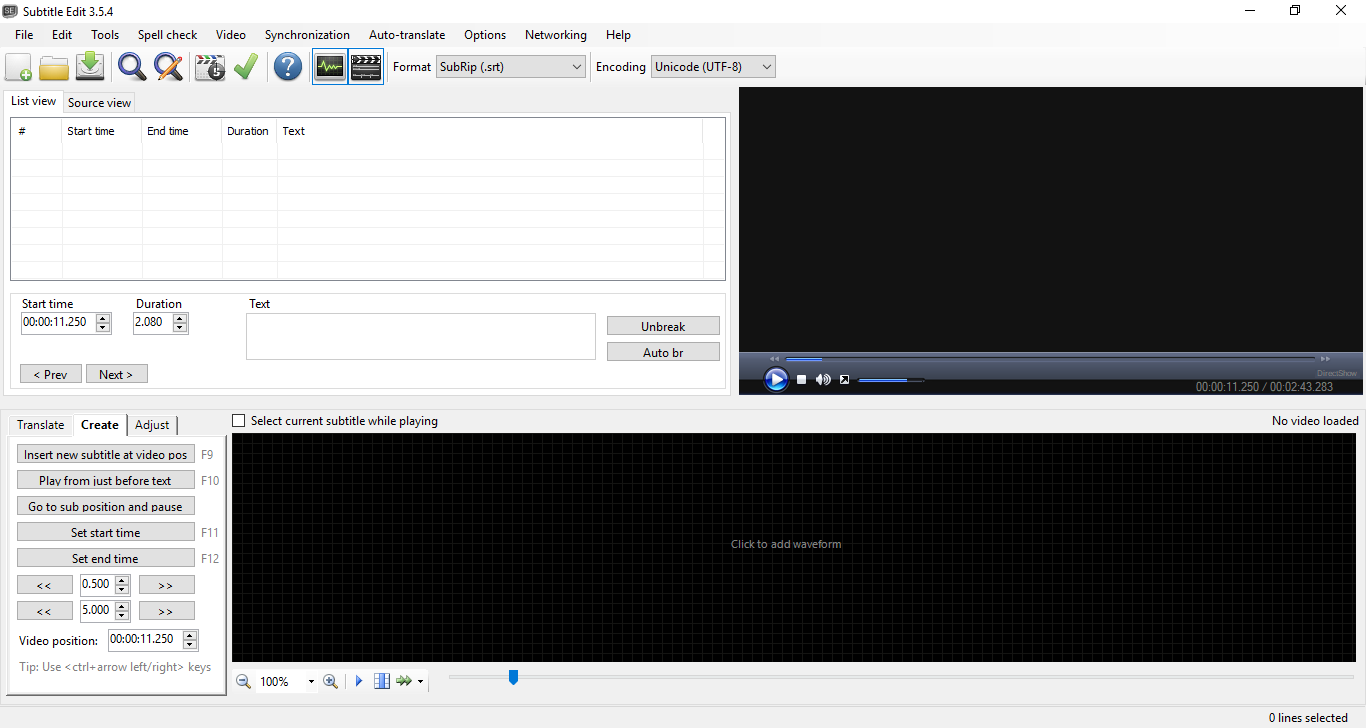
There are many programmes for subtitle editing out there. In fact, you can edit them even in your Word pad, although it would be quite problematic. My personal pick is Subtitle Edit – it’s rather simple and convenient, and it has all the functions I need. Here is how the SE interface looks like:
2) Upload your video
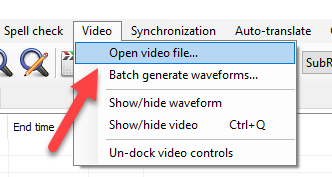
To do it, you will have to go to Video >> Open video file… . We are going to work with our Tawk.to support chat application review, which you can find at our YouTube channel.
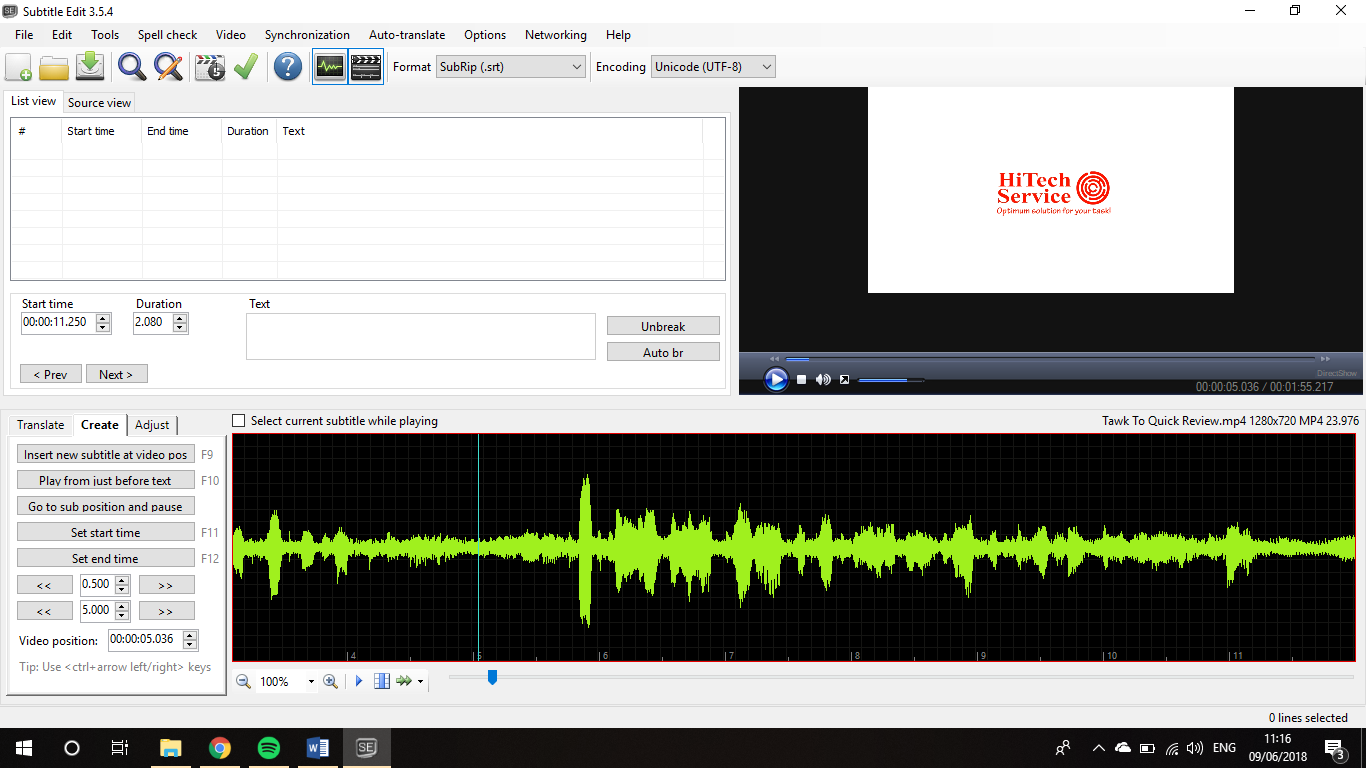
Now that your video is uploaded, it can be seen in a player section to the right. Below it, there is a waveform section. Double-click on it to add the soundwave there – it will make the process much more convenient, helping you understand where the phrases start and end. What you will be seeing afterwards should look like this:
3) Add subtitles
Go to the menu to the left of the soundwave and click Insert new subtitle at video pos. You can also use the F9 shortcut.
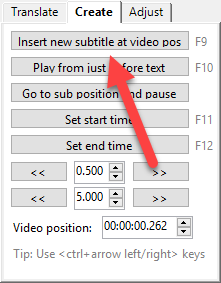
After that, you will be able to set a timeframe for your subtitle. That’s where the audiowave comes in handy: you can select the phrase you want to sub right there using your mouse. You can change its length in just the same way by dragging the end of the selected part.
Above there is a text field where you should enter your phrase. Be careful not to make it too long – reading three lines of a text at once is confusing for the viewer. The best option is to break it into short parts when the pauses come in or where sentences end. After entering the text, you will see it on your waveform and up in the subtitle list menu. All the metadata as start/end time and duration are also there.
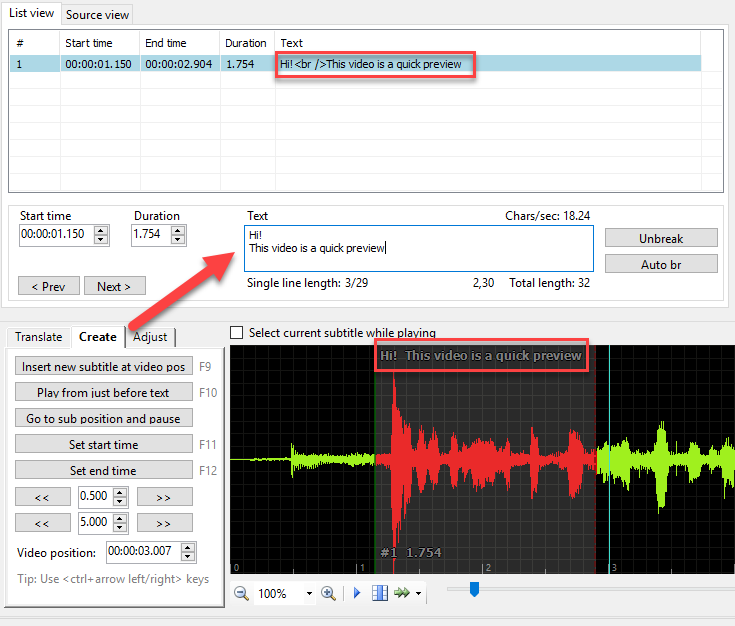
See the screen below to check how your working environment will look when you add more subtitles. You will be able to quick preview how your subs run with your video, starting it in the video player to the right.
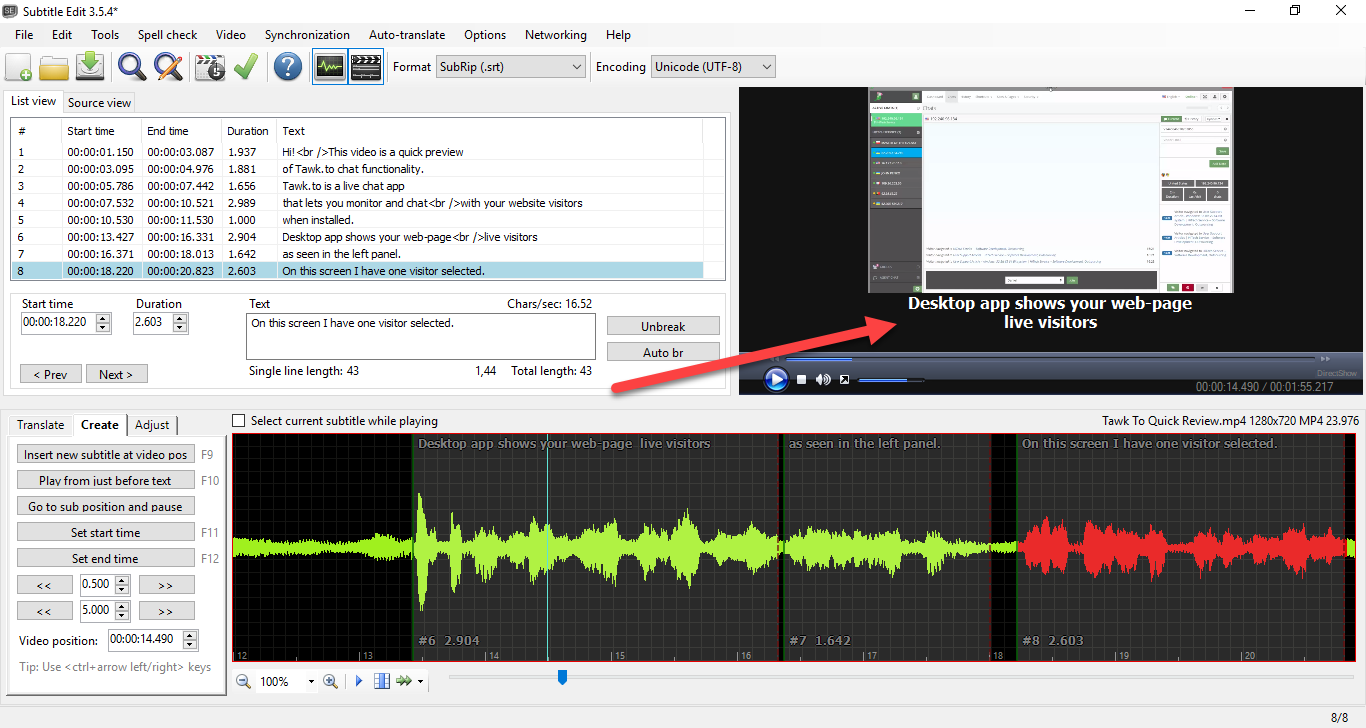
4) Toy with formatting
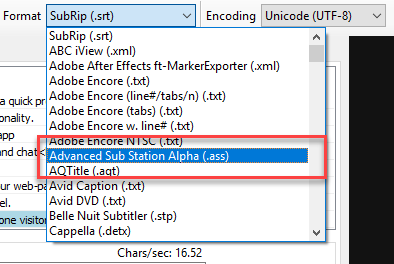
By default, the format of your subtitle is set to .srt. That means that you cannot change the way your subtitle looks like except for some basics as size and white/yellow colour (which you can do in powerful media players such as KM Player or VLC). To alter the subtitle itself, you should first change its formatting. Among all of them, you just have to pick the one that is the easiest to remember… Go to Format dropdown menu over the subtitles’ List view and set it to Advanced Sub-Station Alpha, more commonly known as .ass. Remember: it’s not funny.
Then, go to Options >> Settings and to ASS/SSA Style pane. Here you can change the font, it’s colour, size, borders, shadows, and many more. NOTE: the preview of the changed font style works only here, you will not be able to see the formatting changes in the preview video player.
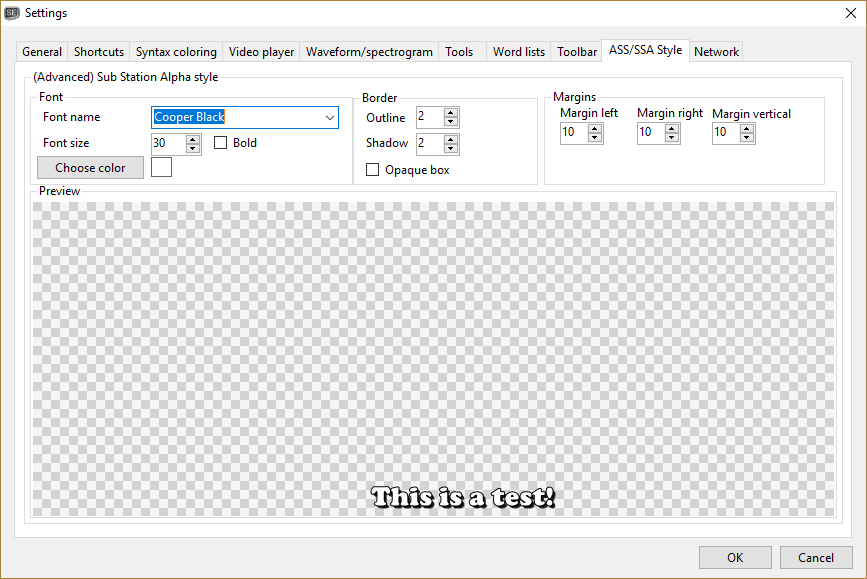
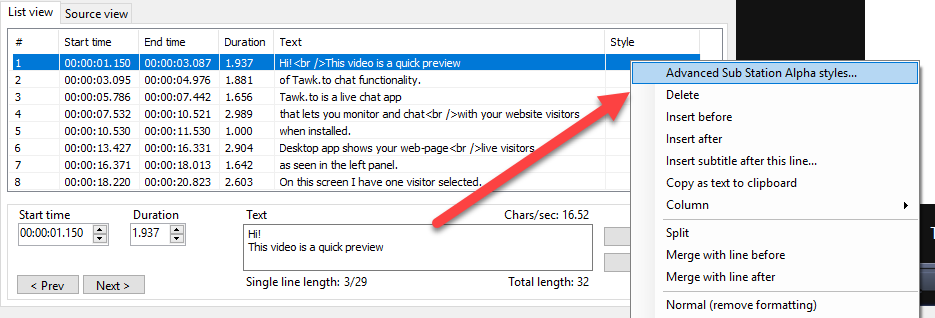
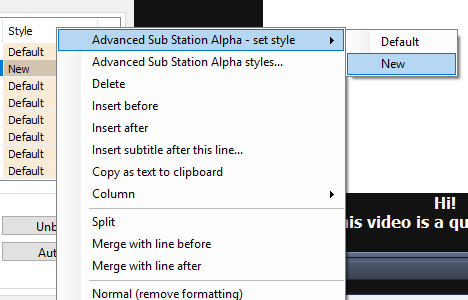
Having applied the necessary formatting, go to File and save your subtitle as .ass file. Then return to your working cabinet: in your List view menu, a Style column has appeared. Now, you can apply the created style to your subtitles. Note that you are able to apply several different styles to your subs if you need. Right-click on the Style field and go to Advanced Sub Station Alpha styles…
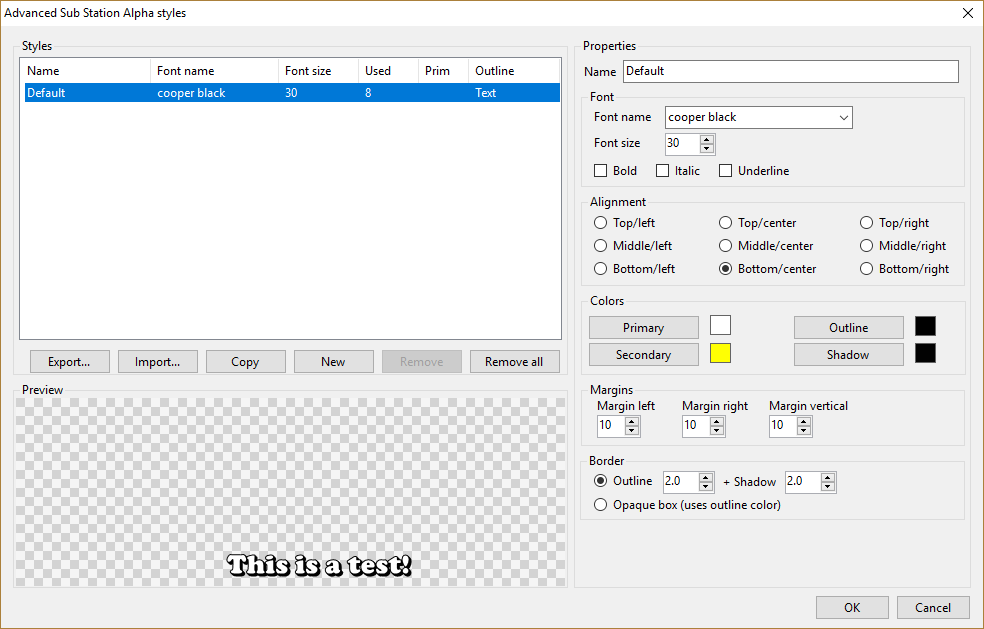
Now we have a menu that is pretty similar to the one we have just been to. Here, our style that we have previously set is available as a default one. We can edit it here, add new ones, and preview everything a well.
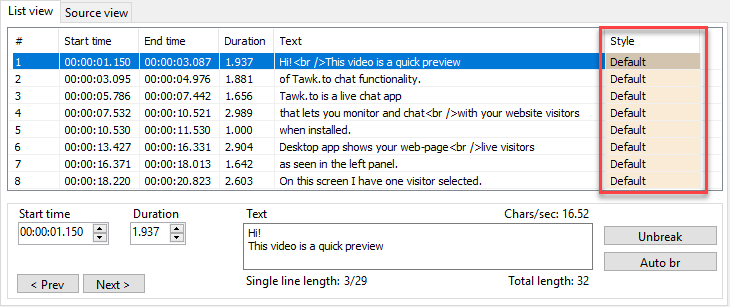
After you have chosen the needed formatting, press OK. In the Style column, you will see the name of the style you have applied:
If you want to apply different styles to your subtitles, go create another one, then right click on the Style field of the sub you need and set the new style there. In my case, it is not necessary since our video is a simple review. But if, for example, you are making a movie or trailer subtitle and you want the text to reflect the character in some way … well, you got the idea.
5) Run it in a video player
The Subtitle Edit programme automatically gives your subtitle the same name as your video has. To check it, you just have to put them in one folder and play the video. I would recommend to use such media players as KMP or VLC. Here’s how my sub looks like in KMP:
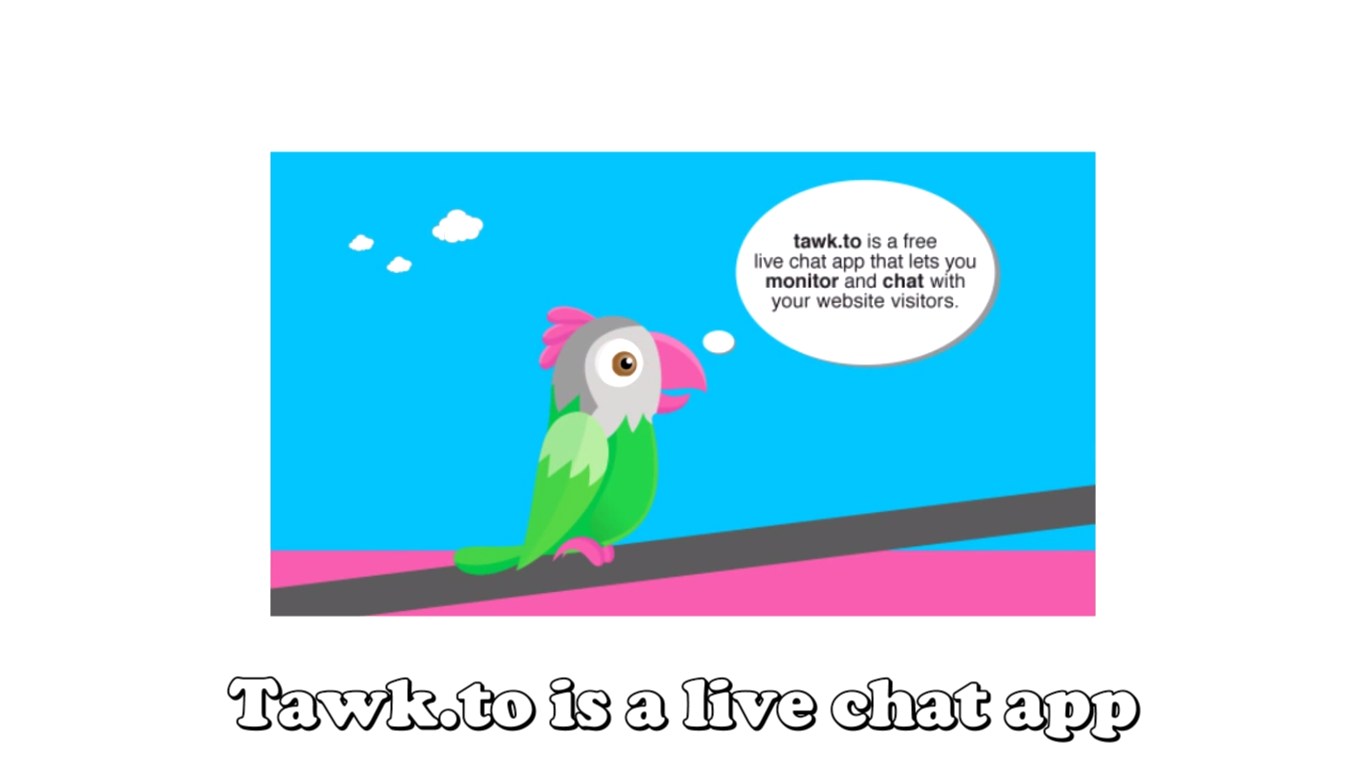

Whoops! It seems that my subtitles are oversized and most likely they will cover the part of the screen where the important information is displayed. Pay attention to such things since they will no doubt spoil even the best video ever. Nevertheless, now that you know how to work with subtitles, I will leave the editing part to you. Open your sub file with the Subtitle Edit – and the procedure is all the same. Good luck!
- On June 27, 2018
- 0 Comment

