Recover data from crashed Windows with installation media only
Windows OS is not ideal and it is not unusual that it may crash in a way that it can no longer boot up. Fixing Windows system in some cases is not an option or requires a lot more efforts and/or money than clean installation. This situation is very common if Windows is rather old and glitchy, but how to recover important files in this case? There are special recovery disks, third party bootable media, bootable tools etc. But what to do if you do not have any of those, and the only thing you have on hand is the Windows installation disk and you need your files available right now?
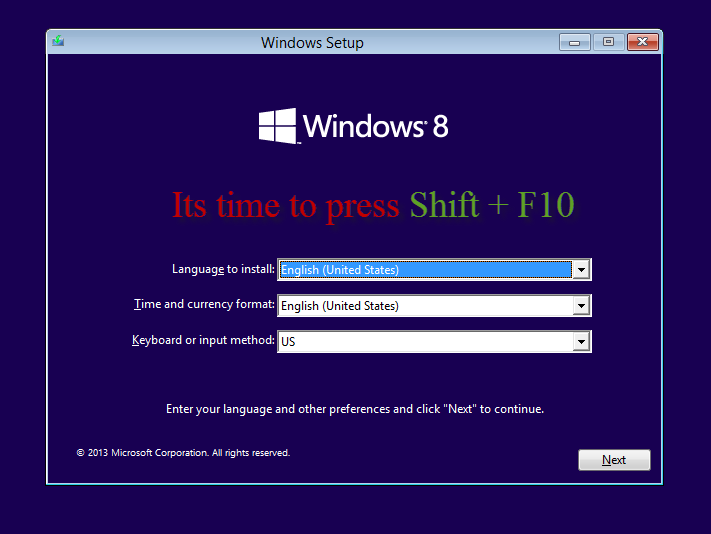
Here is the remedy. It is called CMD, or command prompt. Actually, windows installation menu does not have the option to launch it by clicking some button from the dialogue window. To launch command prompt, you will need to use the keyboard combination Shift + F10 while on the very first screen of the installation process and there is no difference whether you have media with Windows 7, 8 or 10, this works on all of them.
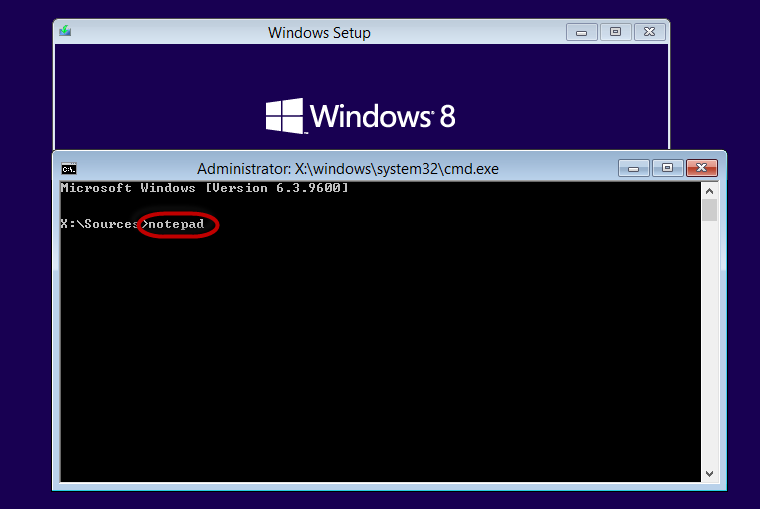
Well command prompt is already enough to copy files to another media but there is one thing…it is VERY inconvenient, especially for those users who barely know what CMD is. So if you do not remember all folder names on the way to your files and have no idea about CMD commands, next steps are exactly for you. So if you are more comfortable with graphic interface just type notepad into command prompt and hit enter. Yes, notepad, there is no mistake.
When you have Notepad window open, navigate to File => Open.
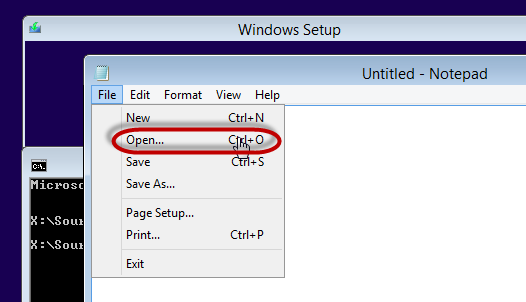
And here is the Explorer window that you used to work with. Well, actually it is not the same to be true. Notepad does not have access to some system resources and libraries, so this Explorer is a bit limited, though it is absolutely enough to copy files in a far more convenient way than doing this in CMD.
Here click on “This PC” on the left and then choose the drive that has your important files on it. Beware that most likely your drive will have another “letter” assigned to it, so just try several drives until you find yours. A hint – disk drive total and free space will still remain the same even if the drive letter changed for “C:” to “D:”.
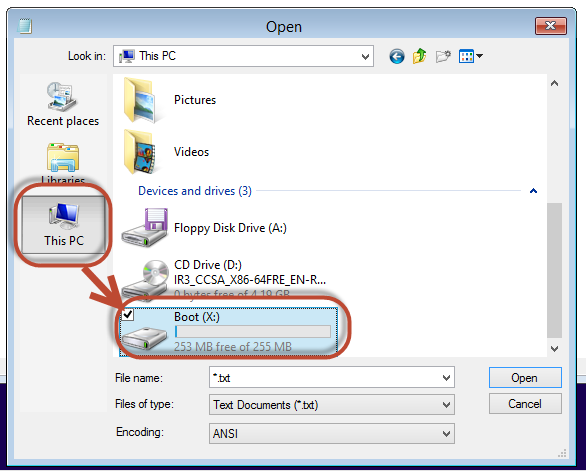
Now some more hints on where you may find your important files. If you are looking for pictures, documents or downloads that you remember were on the system drive, then you should first navigate to “Users” folder, then select your user profile and then you will see the folders that most likely have all the files that you need. Desktop files are also located here, in the the Desktop folder.
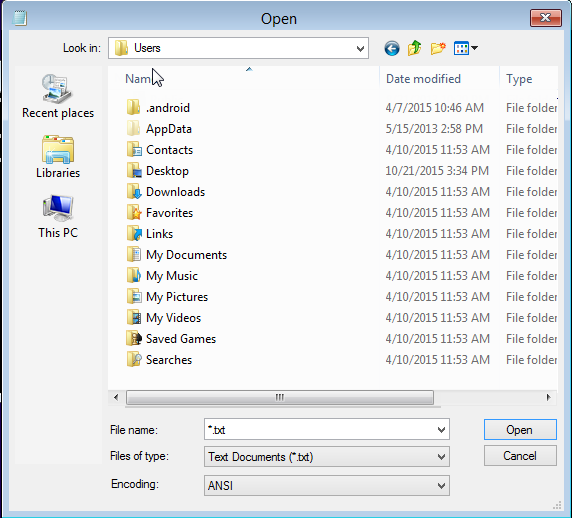
Next thing you need to know is that this window by default shows only text files, so do not panic if you cannot find all the files in the folder. Just change the file types to display to “All Files” as shown on the screenshot.

And copy the data on non-system partition, or other media.
Now you are 100% ready to start copying the files. Since Explorer is not fully functional, you will need to copy files or folders one by one (we recommend to copy folders to save time). To do this right click on the selected file and choose “Copy” from there.
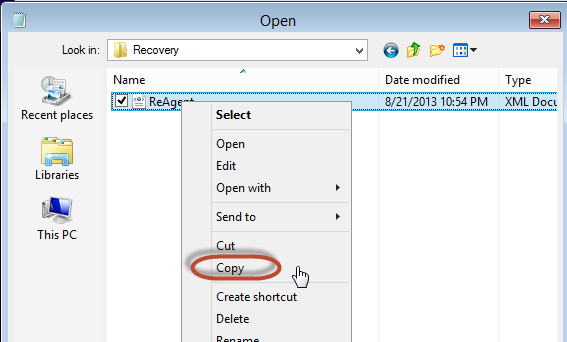
Then navigate to the destination drive and folder, right click on empty space and select “Paste”.
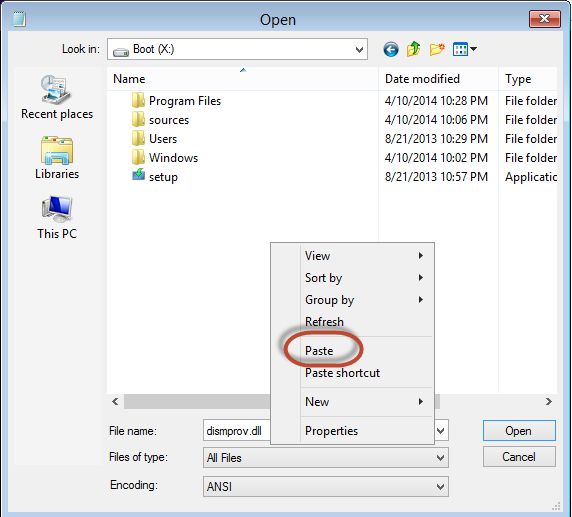
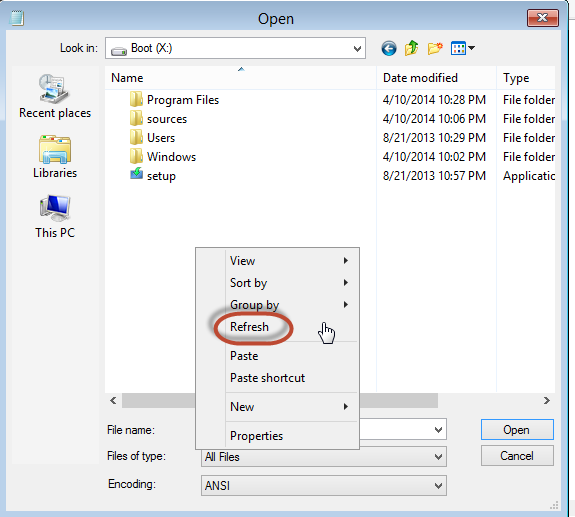
One more thing you should know is that this dialogue box will not show you any progress indicators and the file will not appear automatically when the process is finished. To be sure that your files got copied, you would need to right click in the destination folder and click “Refresh” from time to time. Yes, a bit inconvenient, but it does the job anyways.
And maybe the last thing your should know here, this interface will not show you “hidden” files, still you can copy “hidden” files and folders by copying the folder located one level above.
When all files are copied, just close notepad and CMD windows and you are ready to proceed with Windows installation process, having in mind that all your files are safe.
- On September 13, 2016
- 0 Comment

