
Turning Off Windows Ink
Windows Ink is a new Microsoft feature introduced in the Anniversary Update in the August 2016. Windows Ink was intended to become a tool that would make your computer pen as easy to use as pen and paper. Sticky Notes, Scratch Pen, Screen Sketch – Anniversary Update is full of apps that waste your desktop space in case you don’t have a touchscreen and eat out your memory.
In case you do not have a touchscreen, you would probably want to turn Windows Ink off, but here comes the surprise – Windows 10 doesn’t have a switch to turn off Windows Ink, so you will need to go a bit deeper into the system settings in order to kill that Ink.
So far we know 2 ways of doing that.
Editing group policy.
You might remember group policy editor from the article about turning off Windows defender in Windows 10. Who knows if group policy screen even exists in Windows 7 (it does) as I can’t remember a case when an ordinary Windows user would go in there, but in Windows 10 we come back to that screen very often.
Press Windows key+R on your keyboard and type in “gpedit.msc”
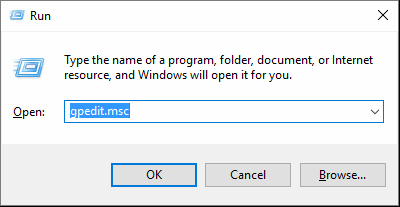
(In case gpedit.msc cannot be found on your computer, scroll down to the second variant.)
Now, navigate to Computer configuration – Administrative Templates – Windows Components – Windows Ink Workspace.

Now double click on Allow Windows Ink Workspace in the right part of the screen.
In the settings screen, click Enabled and in the Options drop down menu choose Disabled.
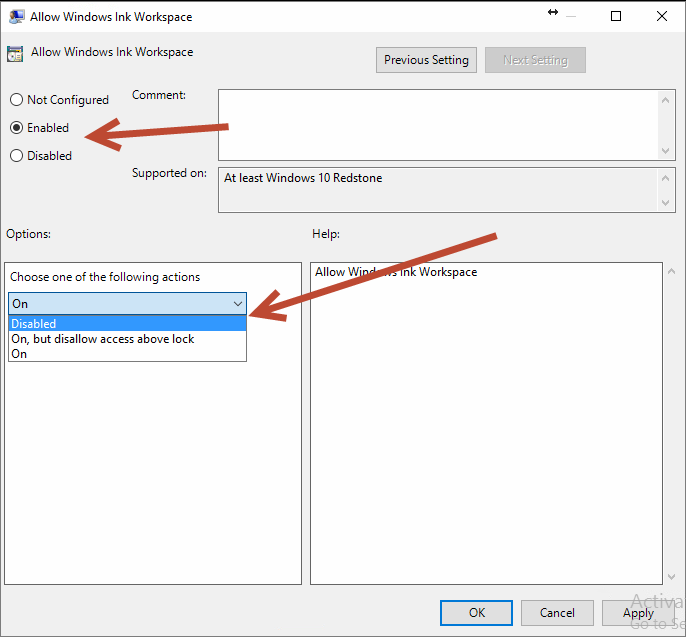
Now, restart your computer and Windows and you’ll forget about Windows Ink, though Sticky Notes would still remain on your screen (if you have them at all, I don’t) as this is an independent app.
This is the easiest way, but it won’t work if you have Windows 10 Home edition, as the group policy screen is not there (we will tell you how to activate it in one of our following articles.)
So let’s take a look at the second option.
2.Editing Windows 10 registry.
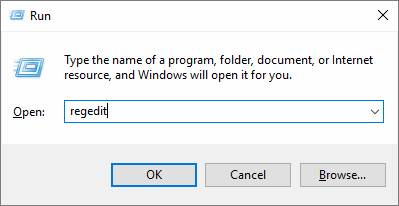
Press Windows Key+R again and type in “regedit” and hit Enter.
Don’t forget that doing any changes in the registry can be risky, and there is one rule while working with this screen – “don’t touch anything, you don’t know.” So follow the instruction carefully.
In registry editor navigate to HKEY_LOCAL_MACHINE\SOFTWARE\Policies\Microsoft
Right click on Microsoft folder and select New – Key
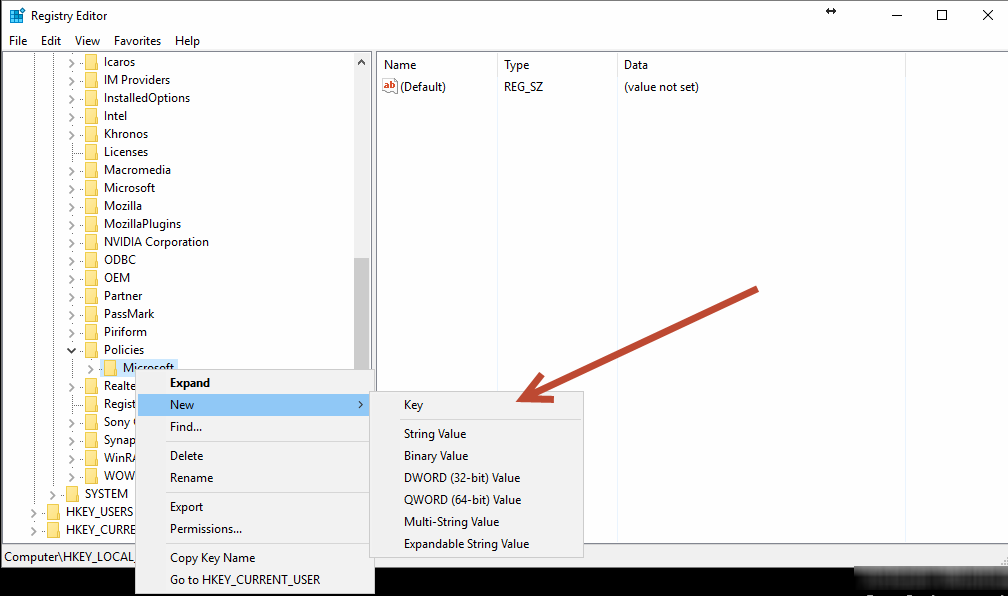
Set the name WindowsInkWorkspace and hit Enter.
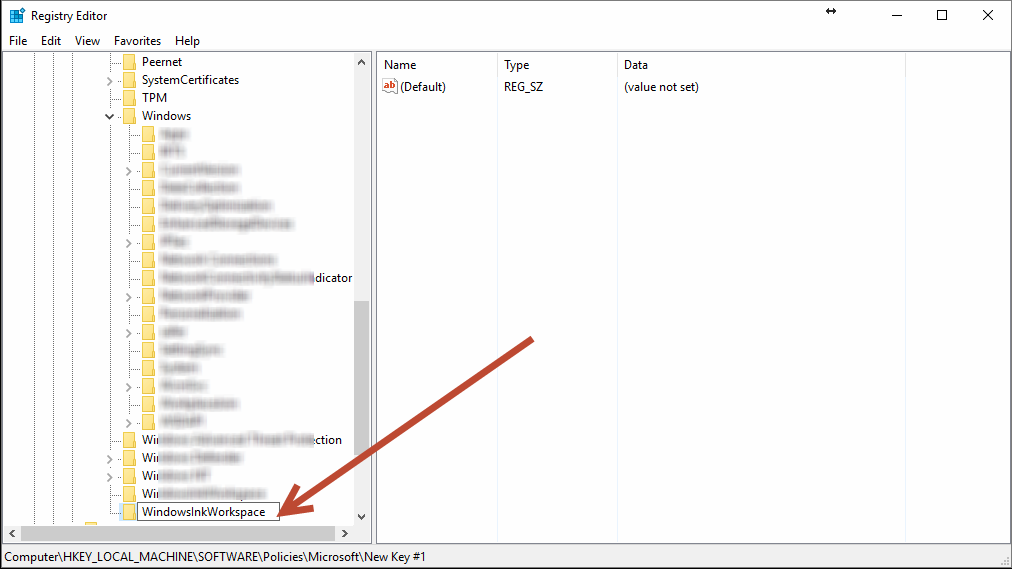
Now, right click on newly created key and choose New – DWORD (32-bit) Value with the same name.
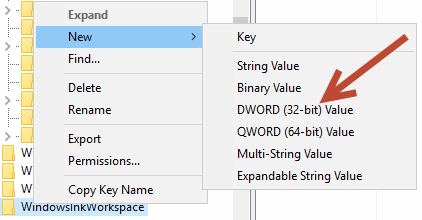
And set the value 0.
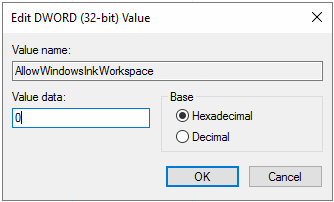
That’s it. Restart your computer and you should be good.
Turning on the Windows Ink would require the reverse steps, 1 instead of 0 in the registry and “Enable” instead of “Disable” in the group policies.
- On September 6, 2016
- 0 Comment


