
Windows 10 freezes randomly
Windows 10 users often complain about the OS freezing randomly even when the system is not loaded with task. After I upgraded my old laptop to Windows 10 I faced the same problem and thought that it was a result of outdated hardware. However, there is a solution.
At least I found one for my laptop. So if your Windows 10 freezes randomly we have several resolutions for you – try them yourself or contact our remote support team.
There are several reasons your computer might freeze, but we can divide them into 2 categories – hardware and software. To exclude issues with hardware try running some HDD or SSD diagnostic tool and check if your drive is ok. For example Ashampoo HDD Control 3 (the tool is not free but you can download trial version for free) can help you with this task, so make sure your HDD health is ok.
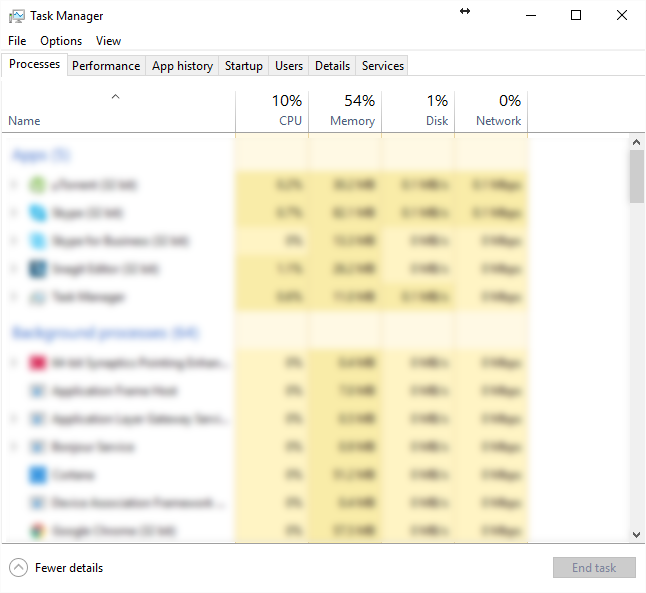
Also you need to check that you have enough RAM. Just run Windows Task Manager and check the physical memory. Right click on the task bar and choose Task Manager.

Also you can check CPU usage.
If you are sure that your hardware is Ok, let’s check possible software problems.
The first step would be to make sure that you have the latest hardware driver installed on your computer. For example you can use the trial version of Drive The Life tool. Most likely the problem will not be resolved, but keeping your drivers updated is a good idea even if you don’t have any issues with your computer.
Now let’s go directly to solutions of Windows freezing problem.
-
Clean Booting of Windows 10.
The whole idea is to turn off all the third party programs and leave only Microsoft running processes.
Hit Windows button and type “msconfig”. Hit Enter.
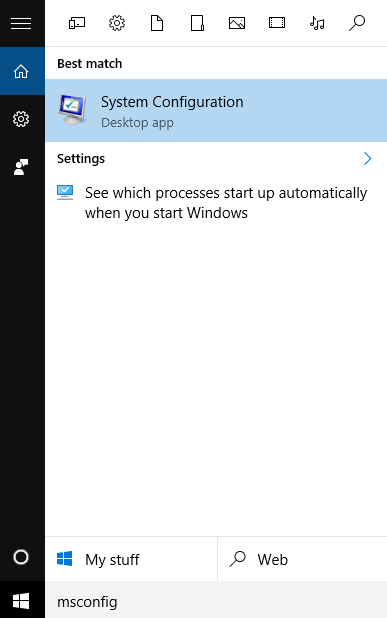
Switch to the Services tab.
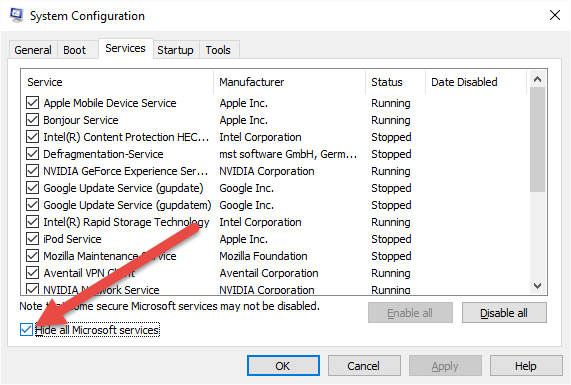
Now click on Hide all Microsoft services.
All you have to do now is to click on Disable all button, then Ok and restart your computer.
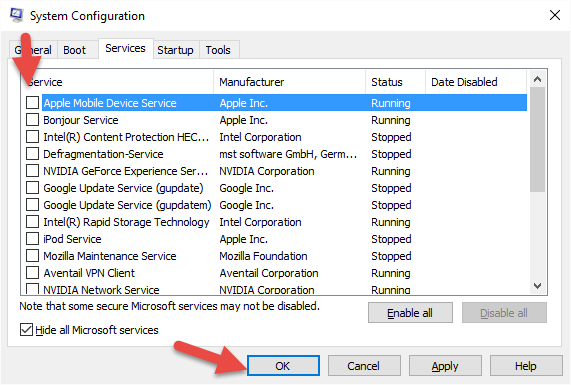
Your computer will run much faster after the restart, but you will need to spend some time to understand if the problem is resolved.
If the problem is not fixed, you can try another solution that worked on my laptop.
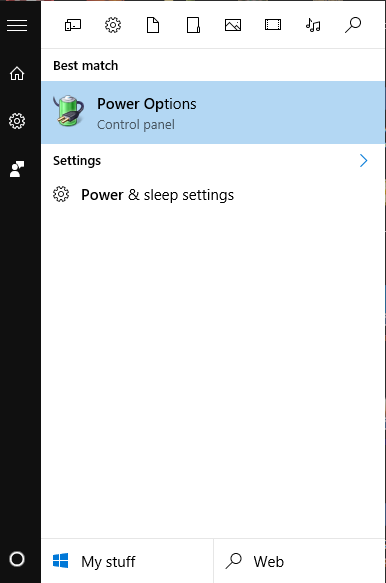
Hit Windows button and type Power Options.
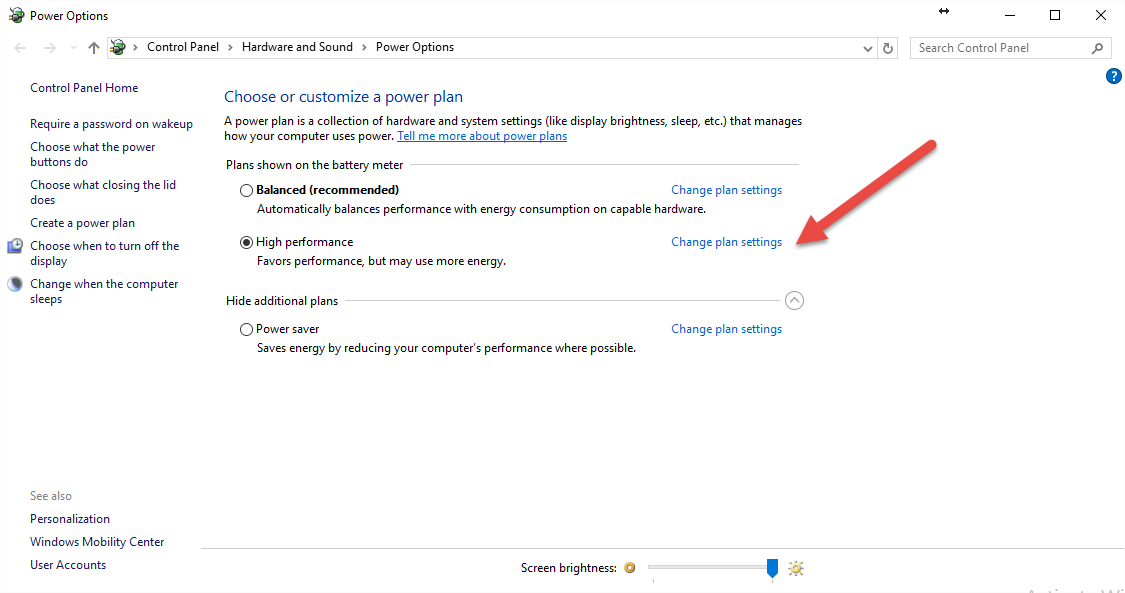
In power Options click on Change Plan settings of the plan that you are using.
In the plan details find and expand PCI – Link State Power Management, set both settings to Off.
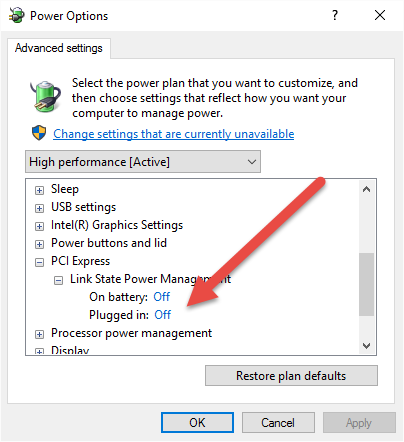
Once done hit Ok button to save the changes.
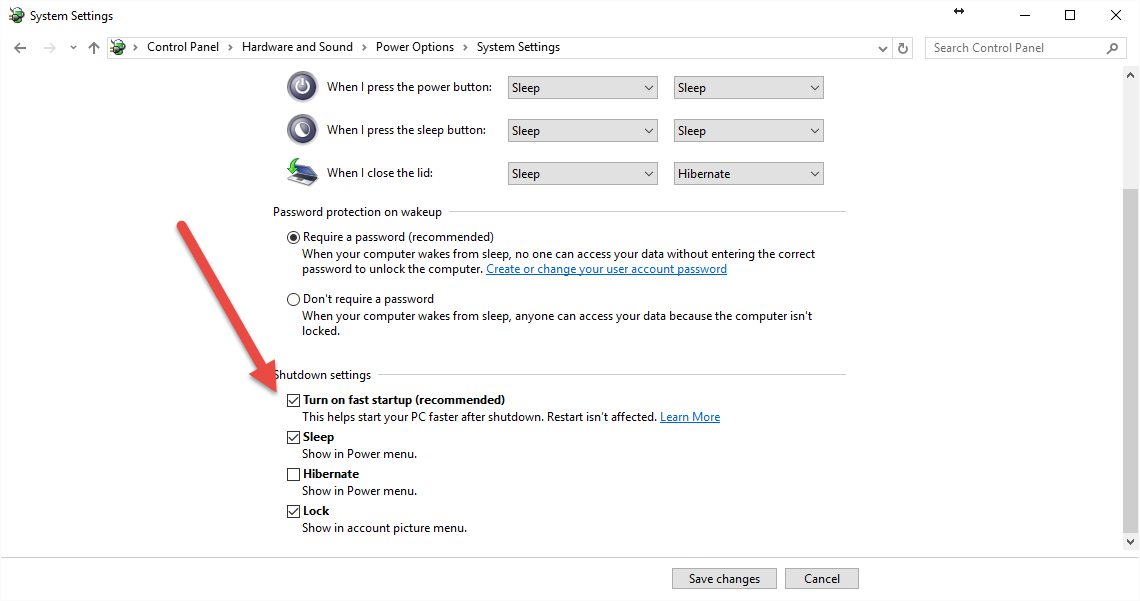
Another thing you would want to do is to turn off fast start up.
Navigate to the System Settings screen and click on Change settings that are currently unavailable.
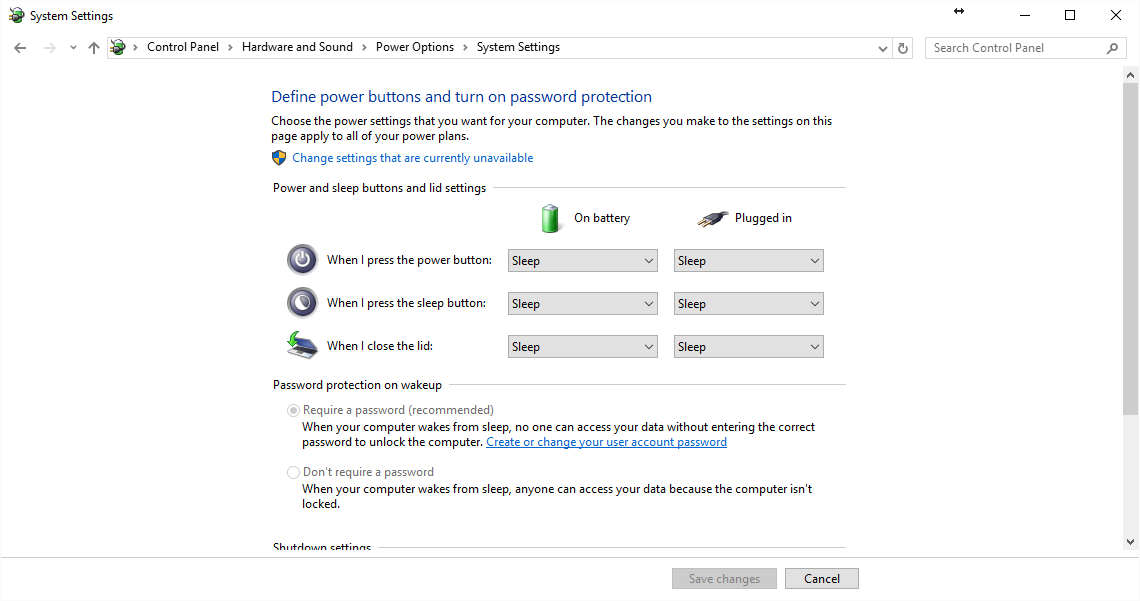
Uncheck the setting you see on the screenshot and hit Save changes.
Uncheck the setting you see on the screenshot and hit Save changes.
- On May 18, 2016
- 0 Comment


