How to set up FTP server
You want to have access to your files at your home or office computer from anywhere, but do not want want to use some third party internet storage services? Or maybe you want to save a 100GB HD video file or a game to or from your home computer, but such big volumes will take much more time to get transferred through internet file storage than a direct transfer? Then FTP is exactly what you need. This is a rather old type of direct data transfer protocol, but it is still widely used all over the world, because it’s simple, and thus extremely fast and reliable when it comes to data transfer.
FTP server can be configured within 10 minutes, enabling you to browse your remote computer file system as an additional network drive. It’s extremely convenient and and supports all the features like read/write/delete and append. That is important if you do not want to start your file transfer from the scratch in case internet connection was interrupted for some reason.
If you want to setup the access to your computer file system from outside, you would need to install and configure an FTP server. We recommend using FileZilla FTP server because it’s fast, user friendly and has all the features that FTP server should have. Oh, forgot, it is free!
The first step will be to download FileZilla and install it on your computer. It can be downloaded for free from https://filezilla-project.org/ web site. Just navigate there and follow the links to download FTP server installation file (not FTP client, be careful).
Once you have the installation package downloaded, install the server using default configurations. This will allow FileZilla server to start automatically with your operating system.
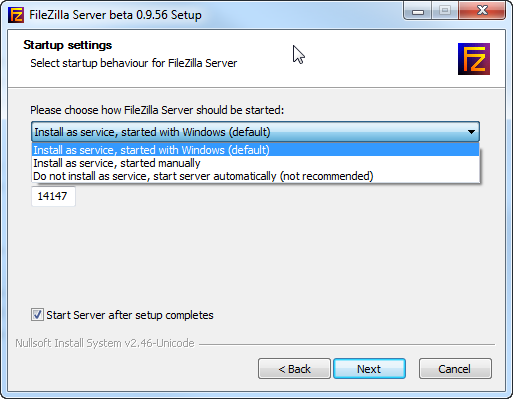
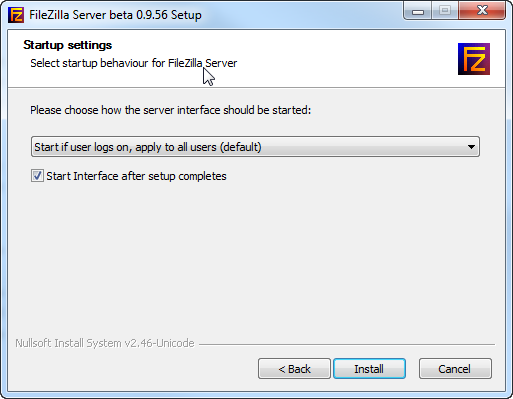
When installation is complete, the program will start automatically. Hit OK on the small window to access FTP server console window. No need to change anything, it will allow you to connect as is.
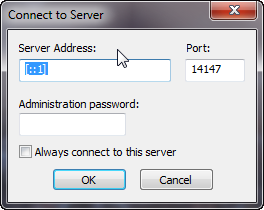
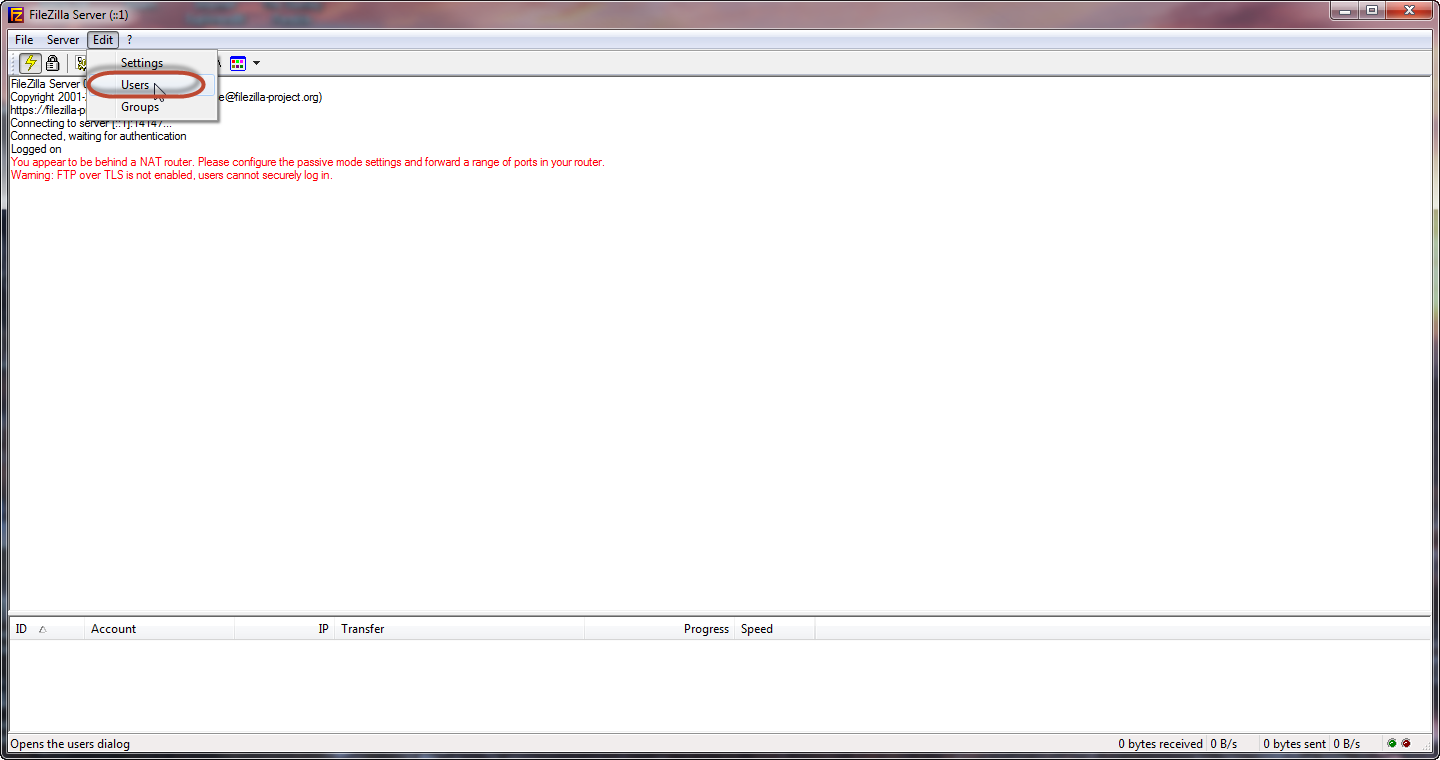
FileZilla server interface is very simple. First we need to create Users who will have access to this computer. Navigate to Edit => Users.
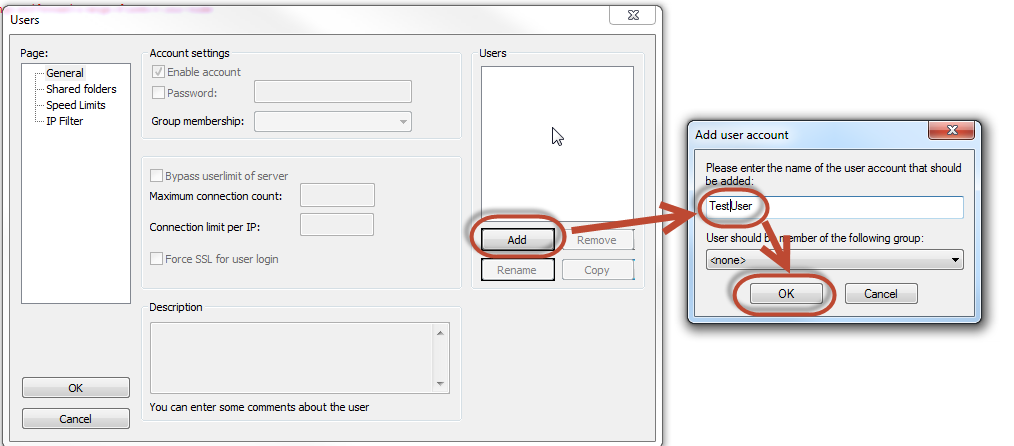
In here, click Add button, fill in username for your future User and hit OK.
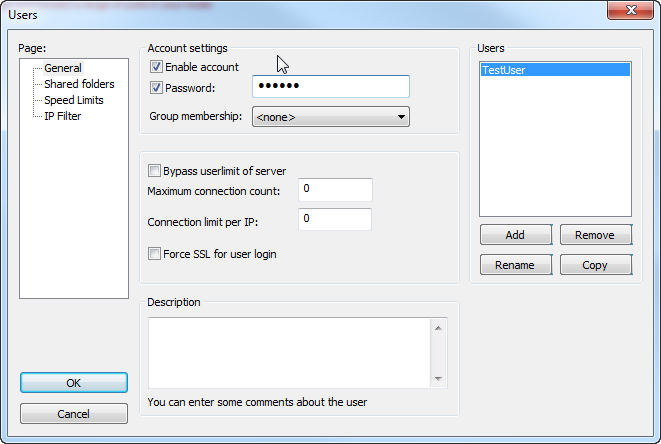
Then set a password for this User. Put the checkmark next to Password and enter your defined password into the text box.
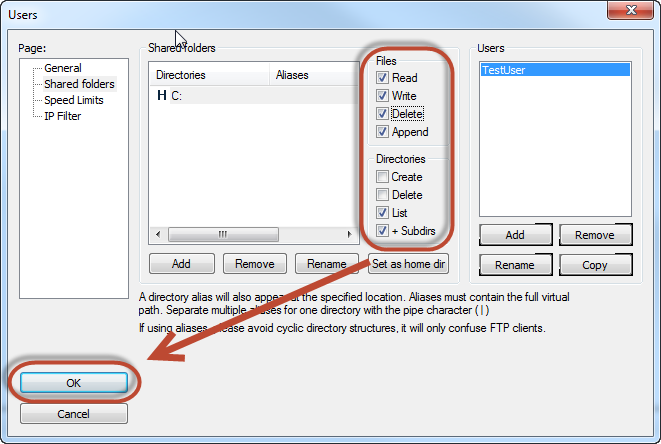
Now let’s tell the FTP server what folders and actions will be accessible for the newly created User. Switch to Shared folders section, click Add button, select the desired folder and hit OK.
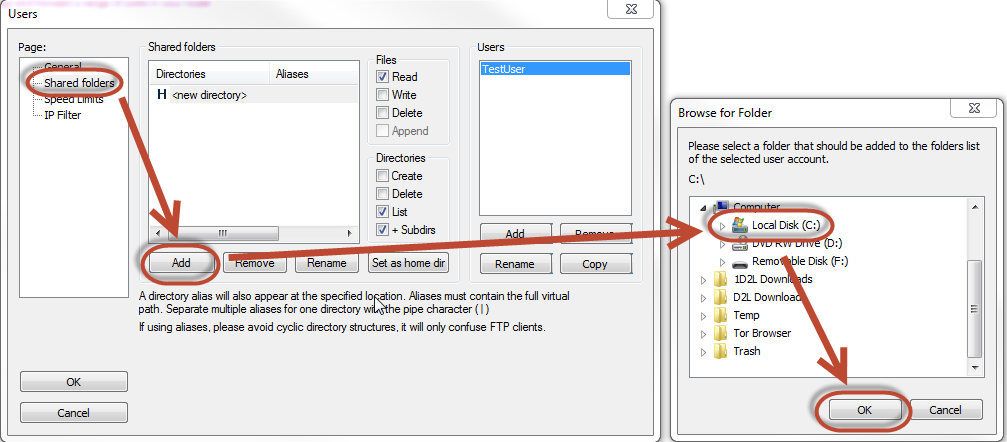
Once the shared folder is set, you can configure access permissions to this folder. These are located on the right from the list of shared folders. Mark the desired options and hit Ok to save and close Users screen.
Now your FTP server is configured enough to allow you to access this computer from outside. The only thing you need is File Explorer on a remote computer and the IP address of the computer where you have your FTP server running. In my case, for instance, I would need to open windows Explorer (not Internet Explorer) and type in ftp:192.168.100.59 into the address bar and hit enter.

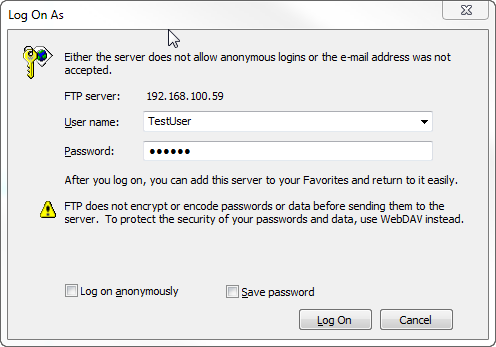
System will ask me for username and password, and when entered, will let me in to the remote computer where I have my FTP server configured.
You can also use any Internet browser with the same address to access your remote file system, but this is not very convenient in case you need to move or drag-n-drop files from or to remote storage.
- On March 3, 2016
- 0 Comment

